Quality Control of PVC Waterproofing Membranes
Testing of welded seams:
All welded seams must be tested for water-tightness. Testing methods depend on available testing equipment and/or clients specification. 3 testing methods should be carried out as follows:
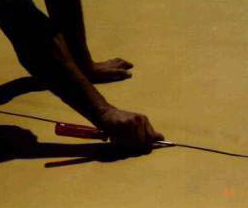
1. Visual test with screw driver
 • correctly heat welded single seams show continuous welding ‘rope’ at seam edge. Irregular, or interrupted rope can be the sign of voids or capillaries in the seam
• glide the head of screw driver (approx. size 2) with slight pressure along seam edge and check visually
• any voids or capillaries must be rectified with hand held welding gun and 20mm silicone roller
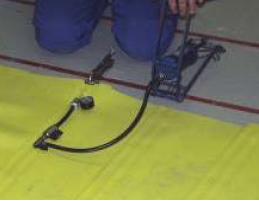
2. Physical test with air pressure testing kit (for double seam welding only)
 all double seams must be tested with compressed air testing kit, containing testing needle, reverse flow valve, manometer gauge and air pressure pump (manual, or electric)
- seal air channel with clamp at both ends of welded seam
- insert testing needle, connected with reverse flow valve and manometer at one membrane overlap end. Connect testing needle with hose of manual, or electric compressed air pump.
- inflate air channel until pressure of 2.0 bar is achieved. Close reverse flow valve. Disconnect hose from testing needle. Check air pressure 20 minutes after inflation procedure.
- the welded seam can be regarded as tight, if the pressure decrease is less than 20%. Release clamp from membrane ends. Heat weld membrane patch over membrane penetration, caused by insertion of testing needle with hand held welding machine. Sign approved and tight seam with marking pen. Record the test in paper sheet form. Repeat this procedure at all double seams.
- if test of double seam welding fails, inflate double seam again and search for leaks. Once detected, repair with membrane patch to be heat welded with hand held welding machine over defective area.
- any voids or capillaries must be rectified with hand held welding gun and 20mm silicone roller at welding temperature
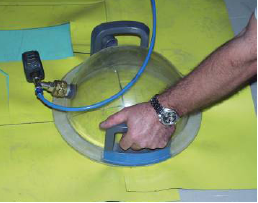
3. Physical test with vacuum bell
 This test requires the following testing kit:
- vacuum bell (Plexiglas, metal frame with rubber-pressure lips, reverse flow valve, manometer gauge, hose connection)
- vacuum pump
- soap solution
- marking pen (chalk pen only)
Test procedure:
- apply soap solution over seam edge within the range of vacuum bell
- press vacuum bell over area, treated with soap solution and build-up vacuum
- visual check of seam under vacuum (bubbling soap solution shows leak)
- remove vacuum bell and clean seam with rag
- any leaks must be rectified with hand held welding gun and 20mm silicone roller at welding temperature, or if required, closed with welded membrane patch


