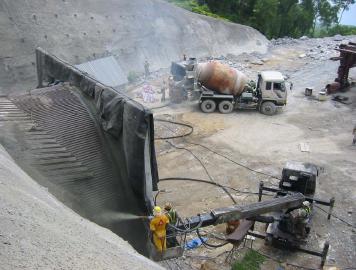
Principle for Dry Shotcrete Sprayed onto Rock Face

1. Introduction
This article gives general guideline for the application of shotcrete onto a rock face. That is only the concept’s principle and there may be actual rock bolting systems. Shotcrete thickness design should be the results of a geological investigations and consequently their results.
2. Principles of construction
a) Cleaning rock surface
Area to be sprayed must be clean. Unsound rock must be removed as well as existing vegetation if any.
b) Dewatering.
PVC pipe should be installed onto the substrate in order to let underground water to be drained otherwise once shotcrete is placed the water will build up water pressure behind the support. The repartition of them depends on the actual water ingress conditions observed during raining seasons. Typical PVC placing considerations:
- More PVC pipe at the bottom up to + 10 m, every 2 meters in length and in high.
- Then every 4 meters.
c) Wire mesh.
If the substrate is not even and shows large irregularities, it is recommended to apply a shotcrete layer to make even the rock support prior the wire mesh installation. This would lead to rebound reduction when spraying onto the wire mesh. It is supposed that the support (rock face) is stable on its own and would not develop any further movement. It is supposed that any fissures are stable fissures.
Therefore it is not considered to install rock bolting for rock strengthening purpose. However it is recommended to install a wire mesh (such as chicken mesh) onto the prepared rock face.
As shotcrete – like concrete – shows good behaviour regarding compressive stress, it does not have much tensile stress resistance. The wire mesh must be well fixed thanks nails onto the surface. It must be free from movements and vibrations. It must be placed as closed as the surface. Not respecting these points would lead to more rebound and poor shotcrete compaction.
Alternatively, steel fibers could be used in stead of wire mesh
d) Spraying practice
Cleaning:
Prior starting the spraying of the shotcrete, the surface must be clean thanks to the spraying of water and air under pressure. This can be achieved by “passing” water through the shotcrete machine and by using the spraying device as tools for cleaning. The surface must be clean from the top to the bottom and the area to be clean should be the one that is going to be sprayed immediately after this cleaning work.
Spraying direction, angle:
Shotcrete must be applied from the bottom to the top by executing a strip in horizontal direction of ~ 1,5 to 2,0 meters high. Once one strip is complete, spraying platform or scaffolding must be moved and the new area could be clean and then sprayed.
When spraying we must consider keeping the following requirements all the time in order to perform good quality shotcrete.
a) The distance between the substrate and the nozzle must be around 1,5 meter.
b) The angle between the surface and the end of the nozzle must be kept as closed as 90o.
After spraying curing:
As we are in open area it is important that the shotcrete is cured. Basically ½ hours after its application, it is recommended to spray onto the surface a liquid mixture based on:
a) 25 liters of Sika Antisol S + 75 liters of water.
b) Once the mixture is prepared, this one is poured onto the machine and we spray the mixture – steam form basis – onto the surface thanks to the spraying device


